AI-Assisted Setup with Rovo
Use the Testream Setup Agent in Jira to choose the right reporter, generate CI guidance, and verify that Testream receives your first test run.
This page is for teams that want guided setup. If you already know your framework and just want to prove the first run, use the Quick Start.
Rovo can make mistakes or suggest configuration that does not match your repository, CI provider, permissions, or Testream project. Review every install command, workflow snippet, reporter option, and API-key instruction before applying it. Treat Rovo guidance as a setup accelerator, not as a replacement for your own validation.
When to Use This
Use the Testream Setup Agent when:
- You are not sure which reporter matches your test project.
- You want CI guidance for GitHub Actions, GitLab CI, Bitbucket Pipelines, Azure Pipelines, CircleCI, or Jenkins.
- You want a first-run checklist before changing your pipeline.
- You want Rovo to help confirm whether Testream received a run.
Before You Start
You need:
- Testream for Jira installed in your Jira workspace.
- Access to the Jira project where Testream is configured.
- A test project that uses one of the supported Testream reporters or can produce CTRF/JUnit output.
- Permission to add a CI secret named
TESTREAM_API_KEY, if you plan to automate the run in CI.
You do not need to paste a real API key into source code or chat. The setup agent uses TESTREAM_API_KEY as a placeholder while you shape the workflow.
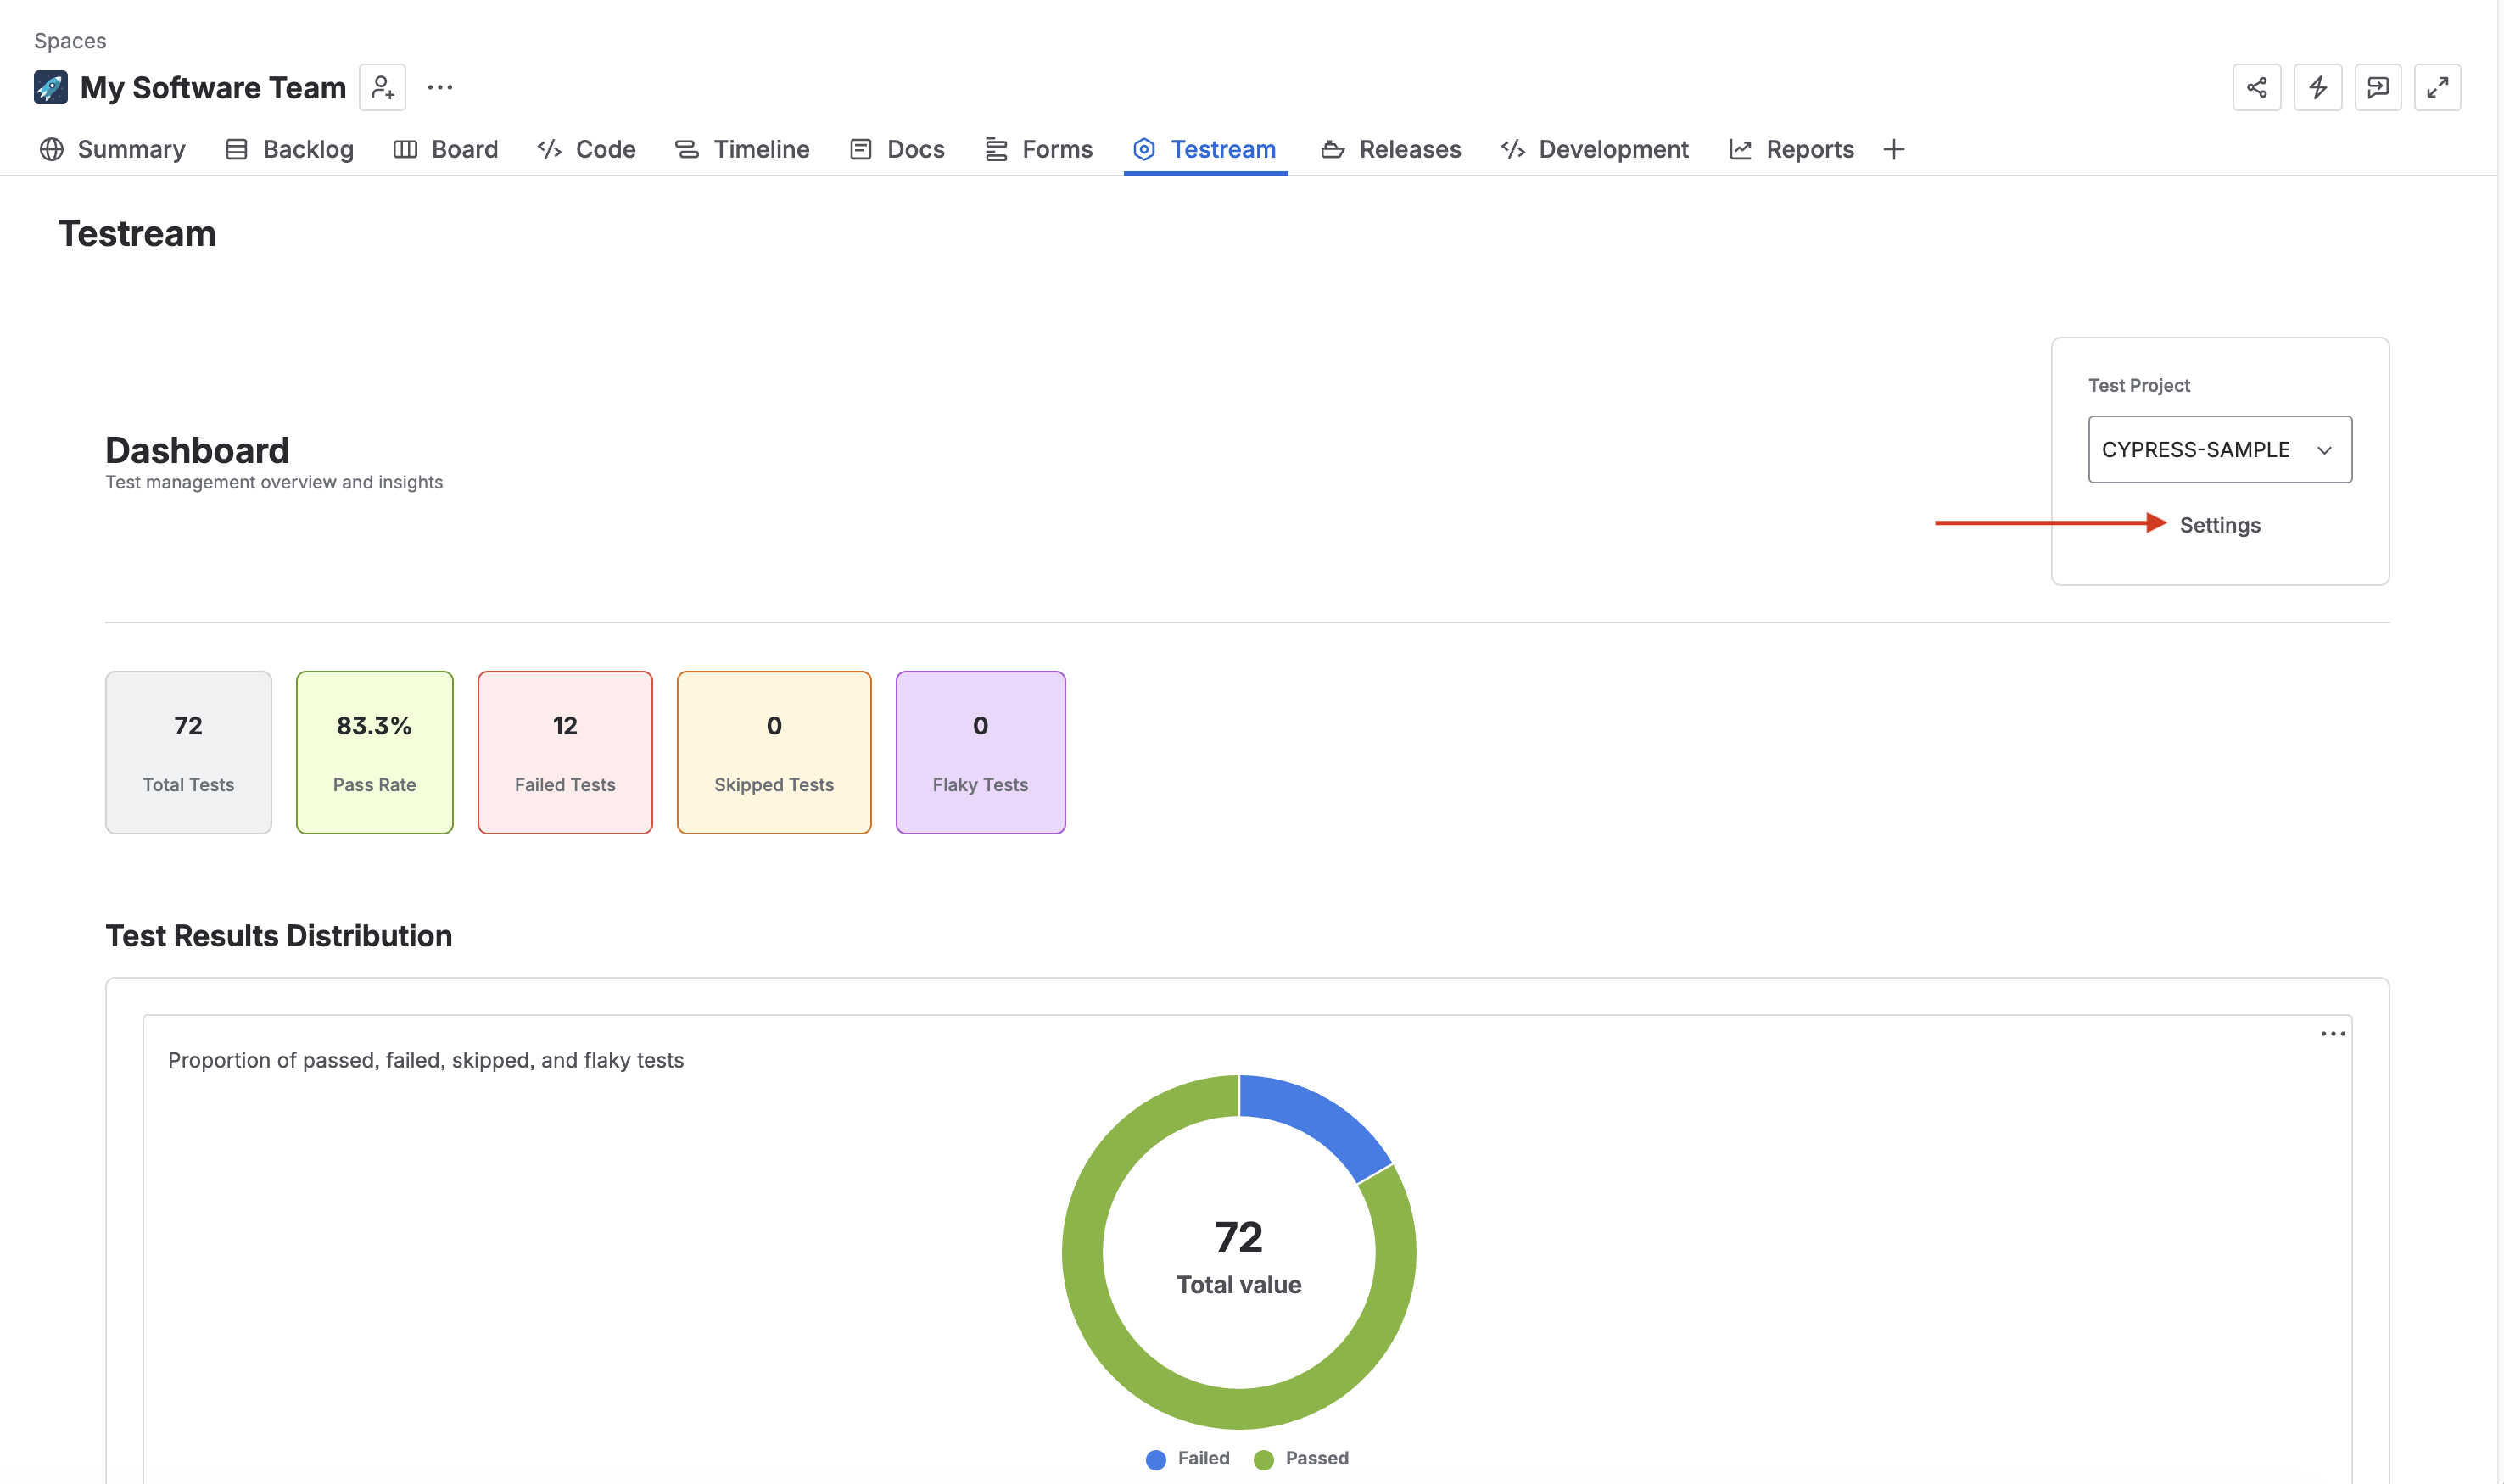
1. Open Testream Settings in Jira
- Open your Jira project.
- Open Apps → Testream.
- Go to Settings.
- Select Get Started with Rovo in the Set up Testream with Rovo section.
2. Choose Your Stack and CI Provider
In the launcher, choose:
- Project/test framework - for example Playwright, Cypress, Jest, Vitest, WebdriverIO, Mocha, pytest, JUnit XML, or .NET.
- CI provider - for example GitHub Actions, GitLab CI, Bitbucket Pipelines, Azure Pipelines, CircleCI, Jenkins, or I'm not sure.
Testream maps those choices to the closest reporter, sample project, and setup template before opening Rovo.
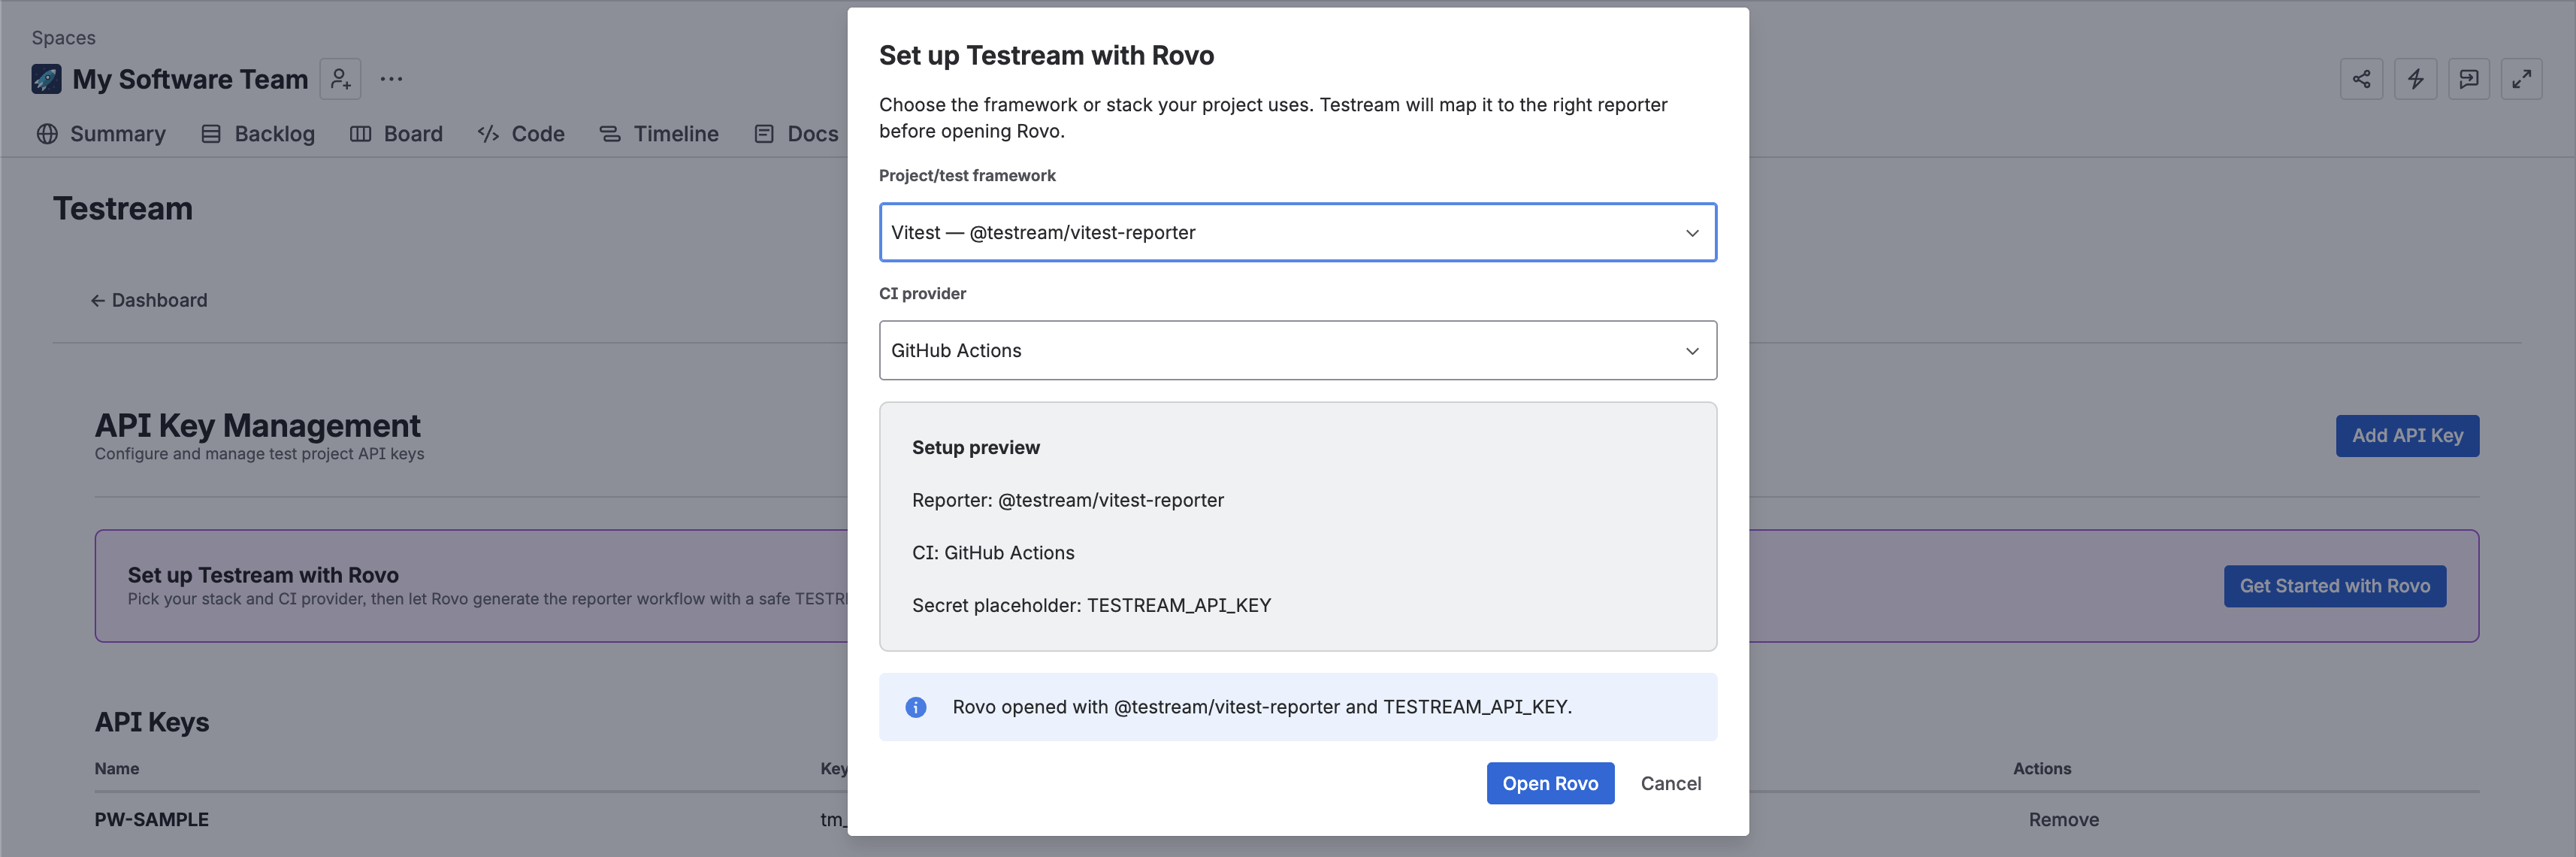
3. Use the Rovo Recommendation
Rovo opens with the selected project context and setup recommendation. It can provide:
- The recommended Testream reporter package.
- The install command for your framework.
- The relevant documentation link.
- A sample project reference.
- CI workflow guidance for your selected provider.
- A first-run checklist.
Verify and follow the recommendation to update your reporter config or CI workflow. Keep TESTREAM_API_KEY as the secret name in generated examples, and store the real key only in your CI secret manager and Testream settings.
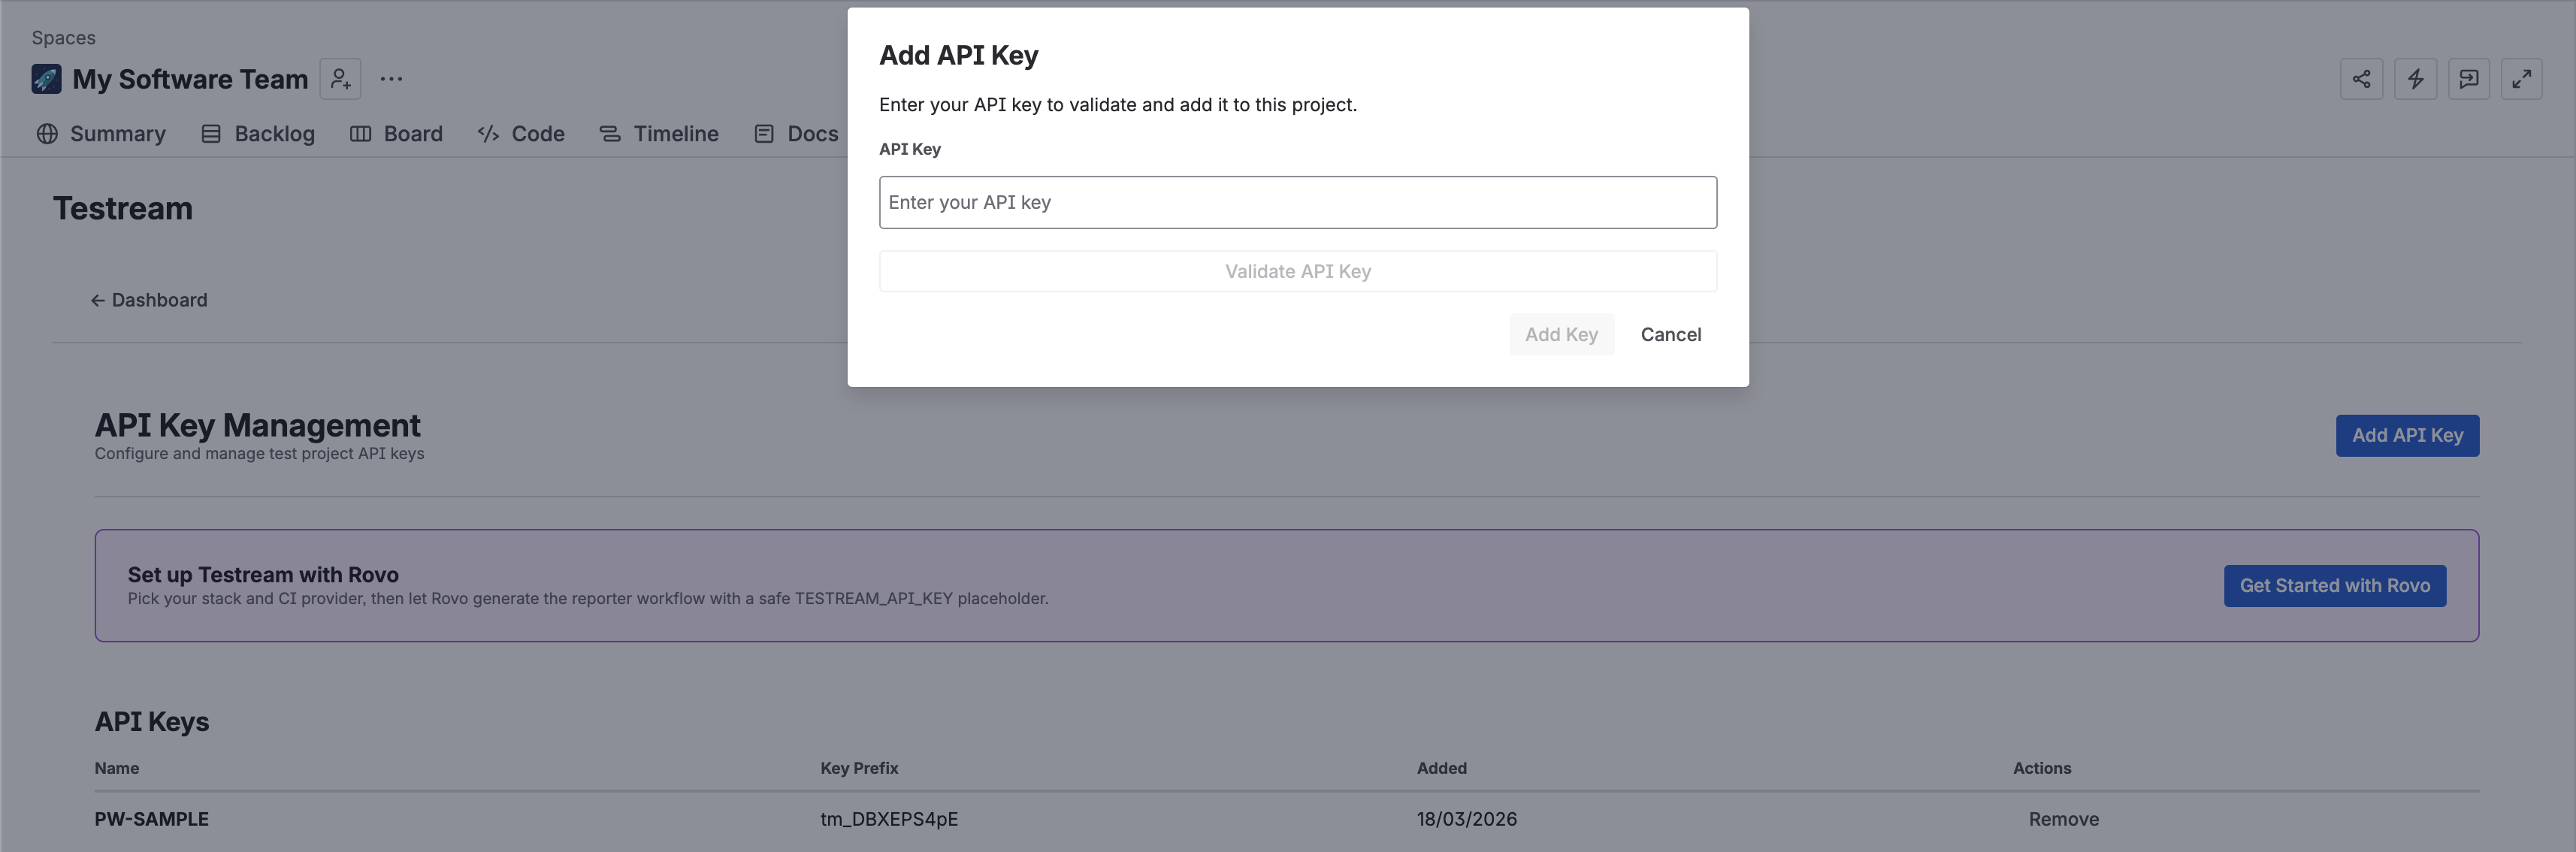
4. Add the API Key
If you have not created a Testream project yet:
- Open testream.app/projects.
- Create a new project or select an existing one.
- Copy the one-time API key.
- Add it locally for a proof run, or store it in CI as
TESTREAM_API_KEY.
Then return to Testream → Settings in Jira and add or validate the API key.
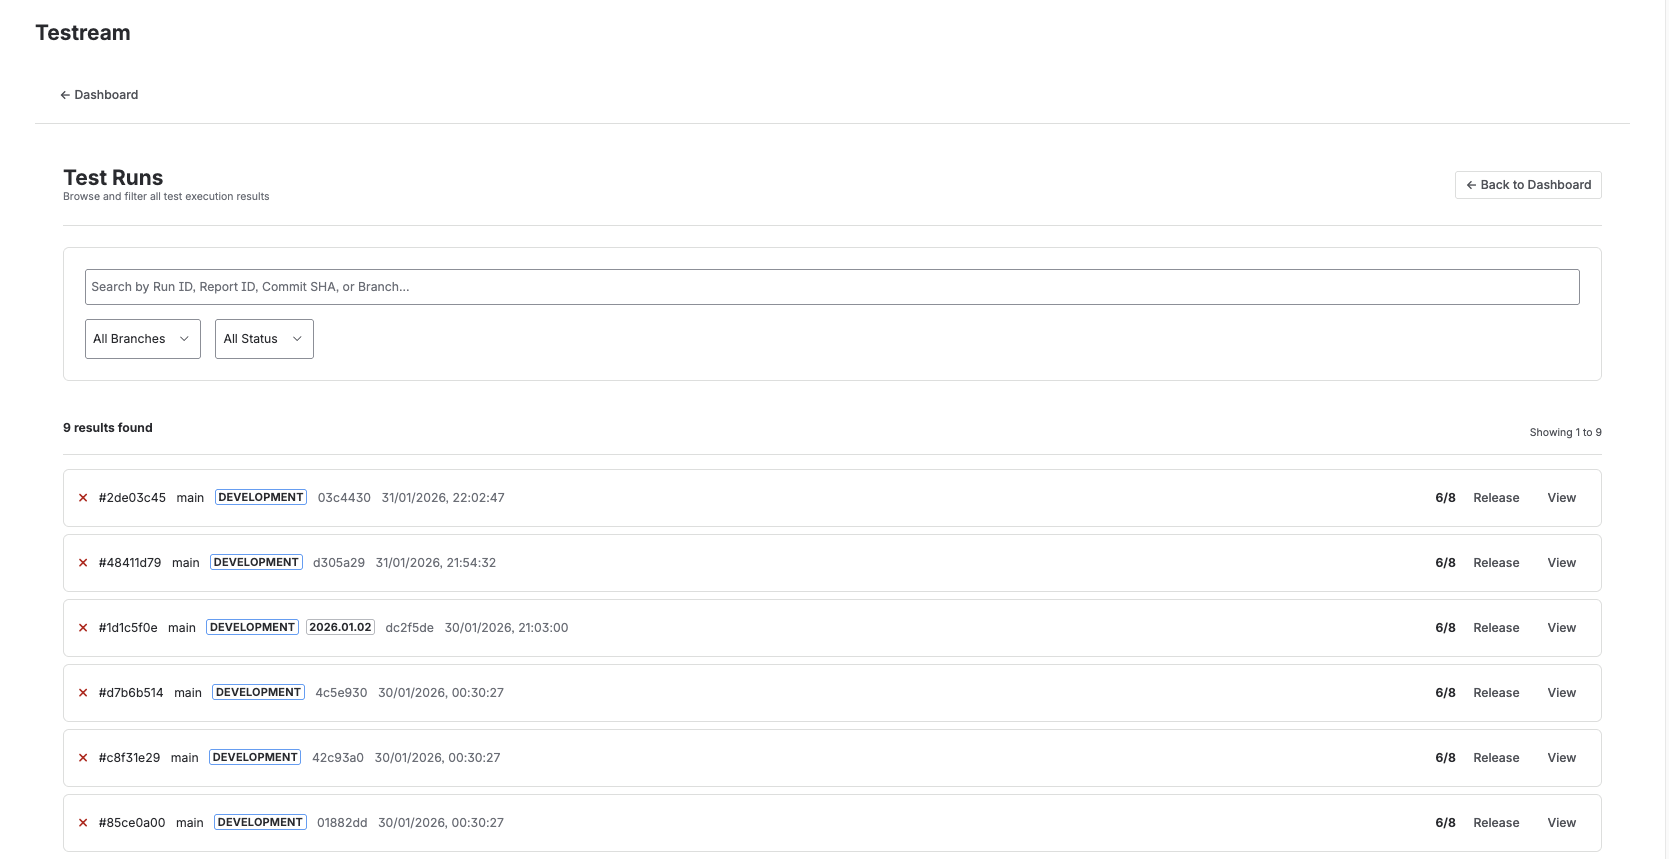
5. Run Tests Once
Run your tests locally or from CI. The reporter should upload results when TESTREAM_API_KEY is available.
After the run finishes, tell Rovo that the tests have run. The setup agent can check whether Testream received a run for the Jira project and return the next step:
- If a run was received, open the Testream dashboard and review the results.
- If no run was received, check the reporter command, CI secret name, project key, and workflow logs.
What Rovo Does Not Do
- It does not store generated CI snippets as a Testream object.
- It does not ask you to paste raw API keys into source files.
- It does not replace your CI secret manager.
- It does not require screenshots or artifacts for setup verification; the first successful Testream ingestion is enough.